A Camper is born at.EZee
The at.EZee concept was a small camper that is capable of being able to be towed on road by a small car, and off road by smaller 4x4's such as the awesome Suzuki Jimny (and it's predecessors) and, vehicles such as the Daihatsu Terrios and Fiat Panda 4x4. The camper must be sturdily constructed to withstand rugged terrain as a companion for more powerful 4x4s.
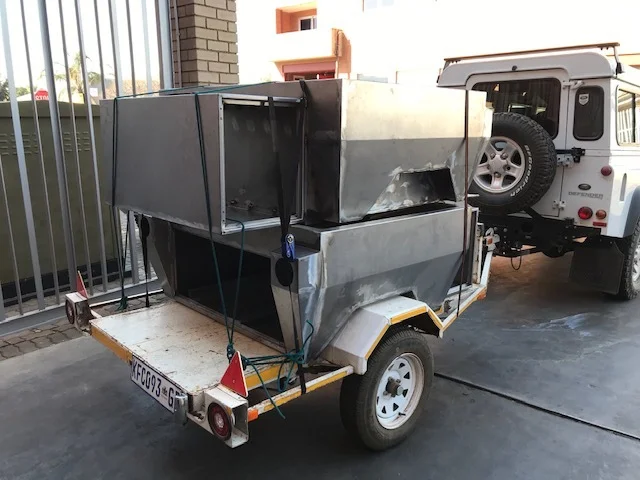
 In late 2019 we started with the at.EZee prototype. The prototype looked like this. In late 2019 we started with the at.EZee prototype. The prototype looked like this. | 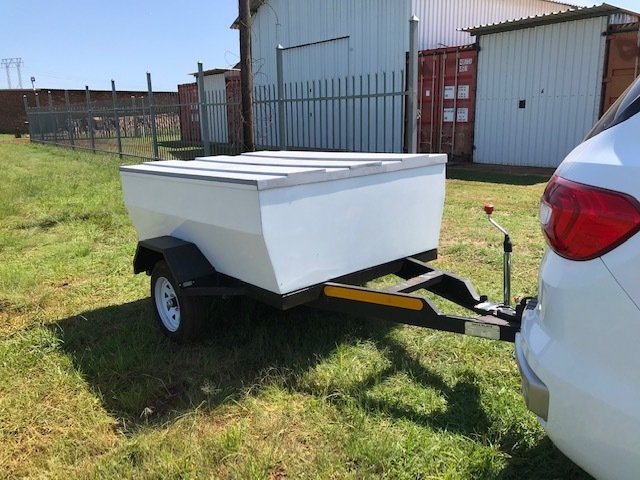 | 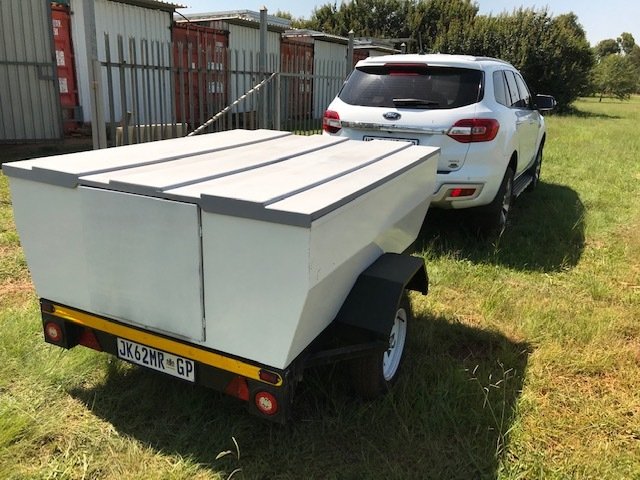 |
| The lid would open containing a double bed under a pull out tent. But we thought it turned out a bit "fat" so it did not meet our design criteria of being tow-able by small cars and light 4x4s... This was Version 1.... |  | 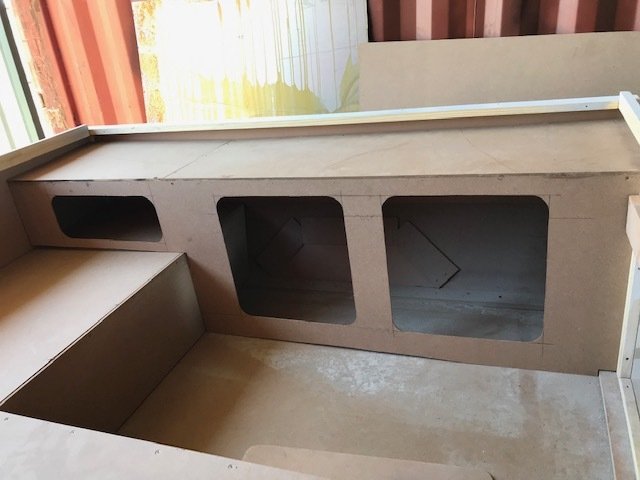 |
Then came Version 2.... With the lock-down forcing a work stoppage, we took the opportunity to review our micro camper at.EZee. | ||
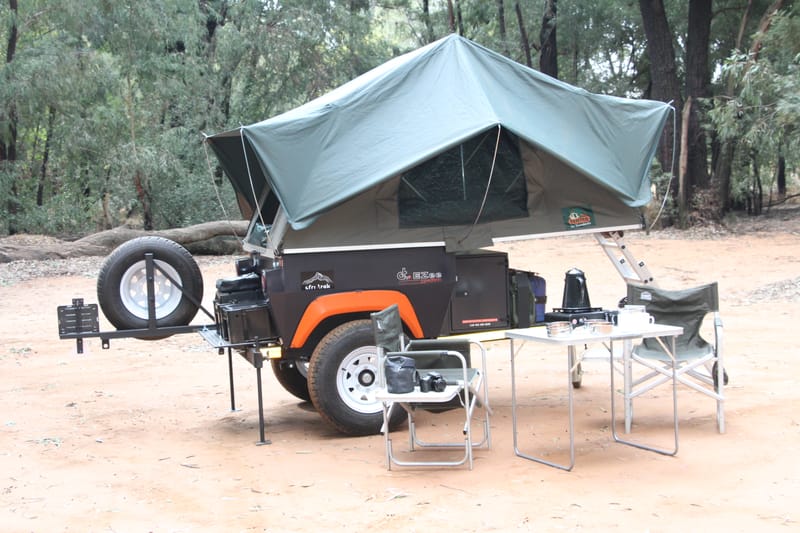
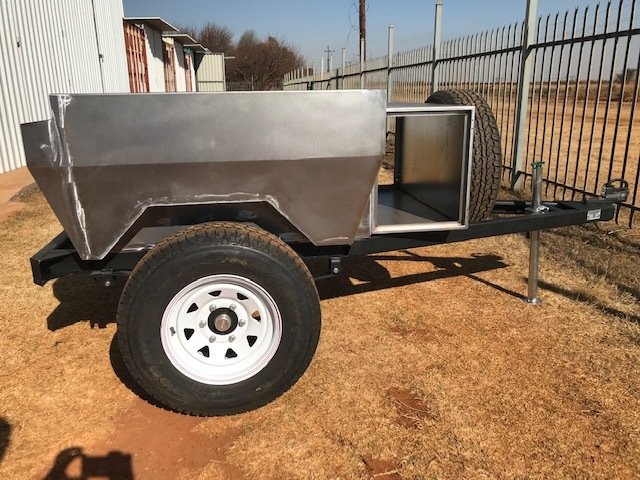
| After the redesign we came up with our rendition of a micro camper, that meets all of our design criteria. A tubular chassis with leaf springs, carries the GRP (fibreglass) camper body. Situated on top of the body, and forming the roof of the camper is a standard 1.4M wide RTT (Roof Top Tent) | 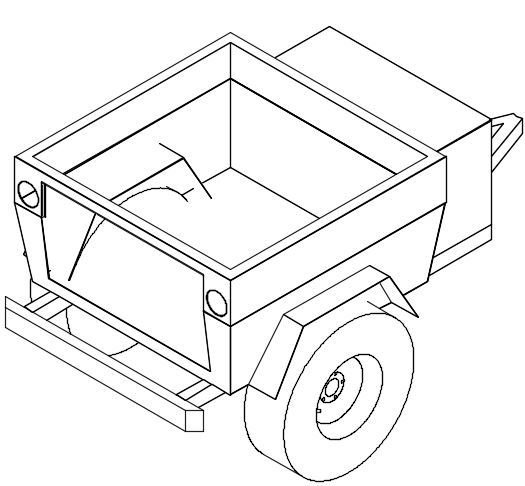 | 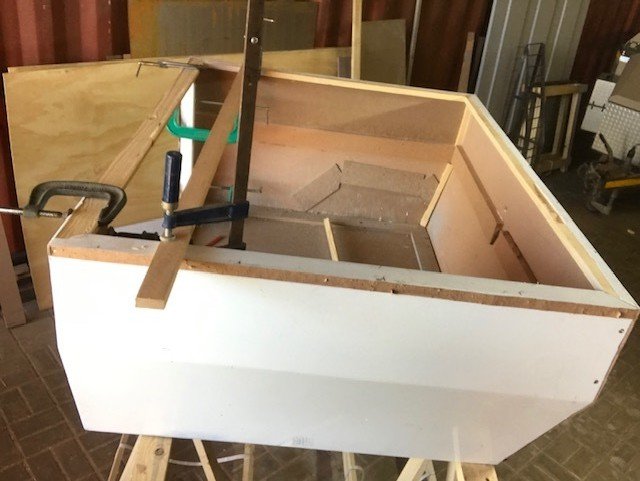 |
| Owners, would be able to select between 13", 14" or even 15" wheels, depending on their needs. 13" is more suitable for smaller, road cars, while 14" is perfect for medium sized cars and small SUVs. The biggest tyres, 15", will give the micro camper more ground clearance, for more serious off-road use. Sleeping accommodation is for 2 adults in the RTT. The base of the camper has a rear door for access to a storage area for 4 x high top Ammo cases. above this is a flat area to place larger items such as two fold-up chairs and a small table, accessible from the top. The nosecone will accommodate a small fridge, if requested. On the far right, the early prototype is on display for some of our avid 4x4 friends and supporters. The group were very complimentary of the design concept and the execution. Work is now progressing to get the micro camper completed so that we can test it. | 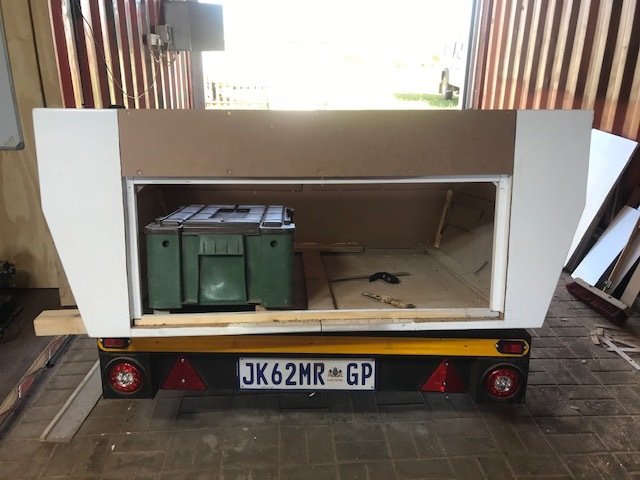 | 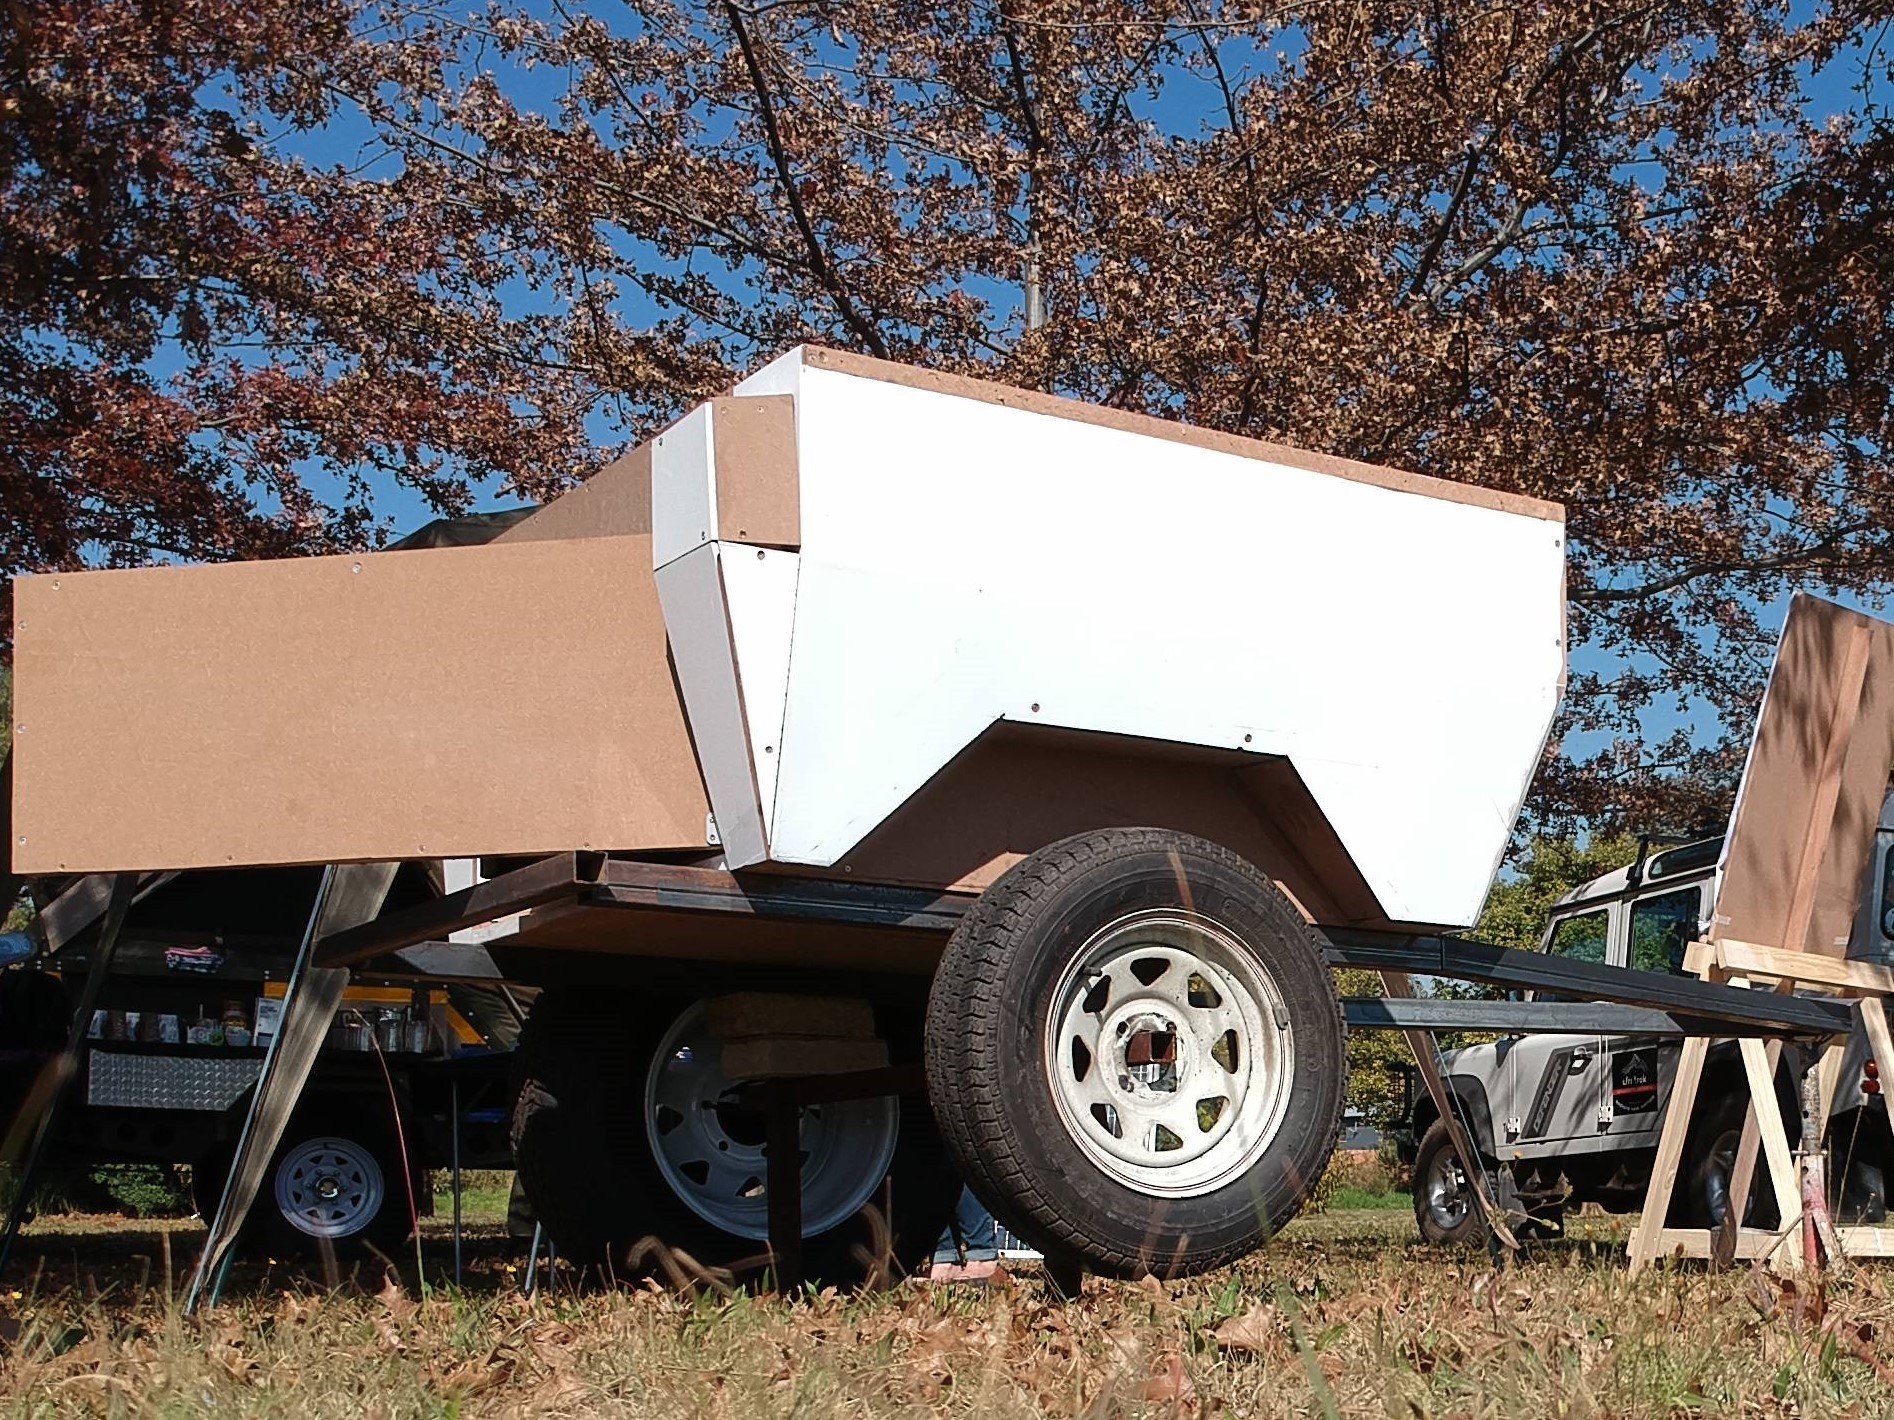 |
Here are some of the pics as the build progresses.
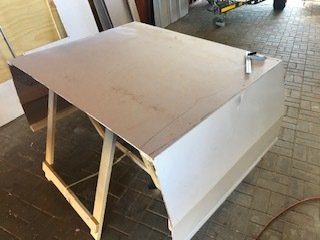
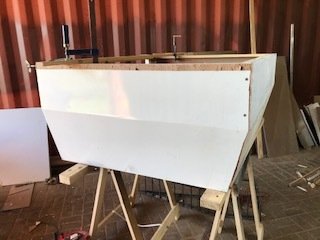
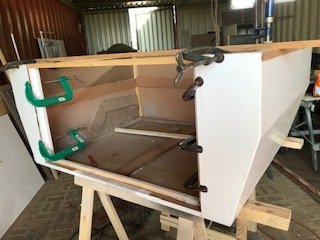
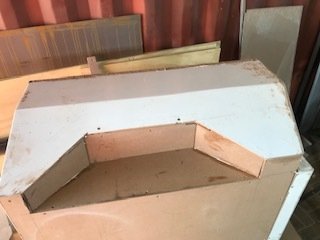
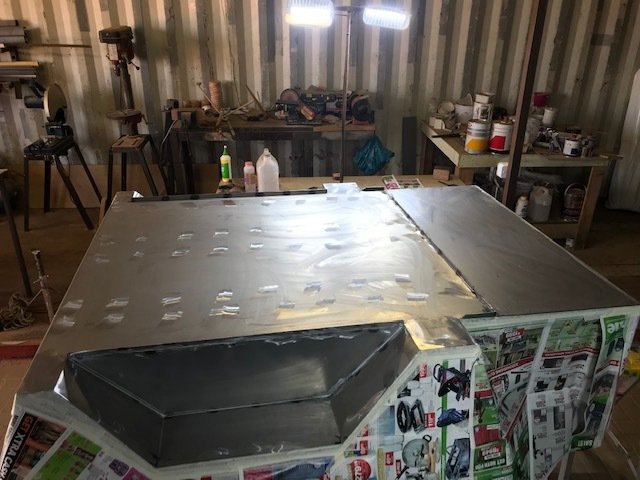
The form from which the fibreglass body is to be built, is constructed from MDF (Medium-density fibreboard) over a pine frame. It is then sanded, filled and a few coats of spray filler are applied. After that, several layers of fibreglass are applied to the form. Once the mold has been separated from the form, the mold is used to cast the camper bodies in future.
 |  |  |
 |  |  |
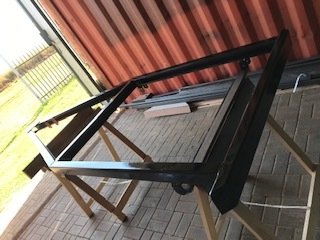
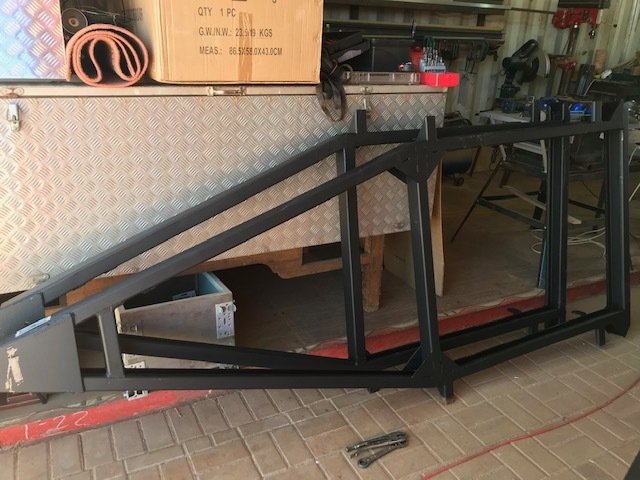
Here we are busy constructing the sturdy frame chassis from 2.5mm mild steel lip-channel. Each chassis is hand made and finished.
 |  |  |
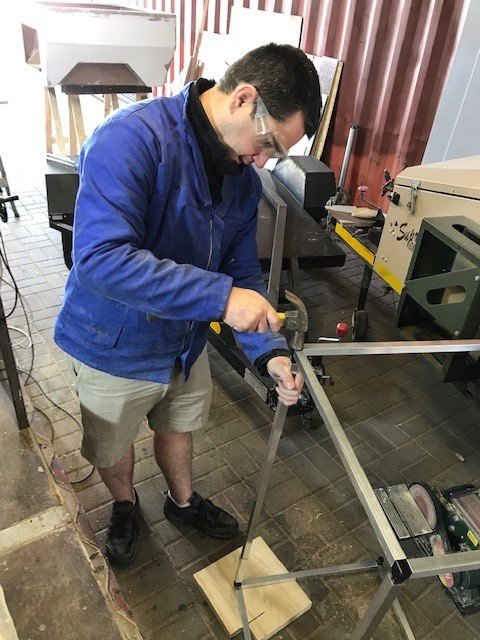
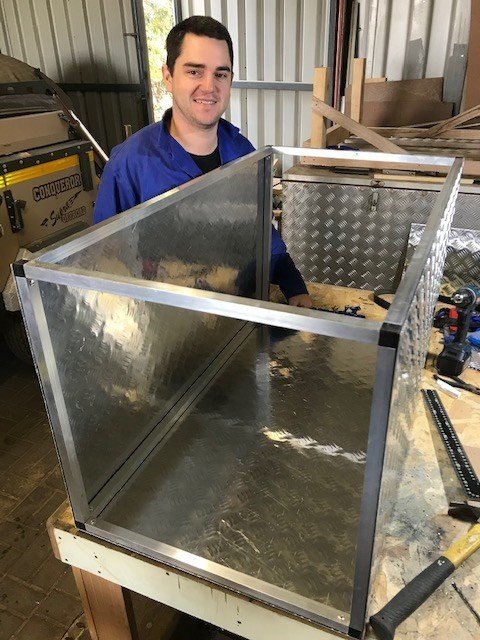
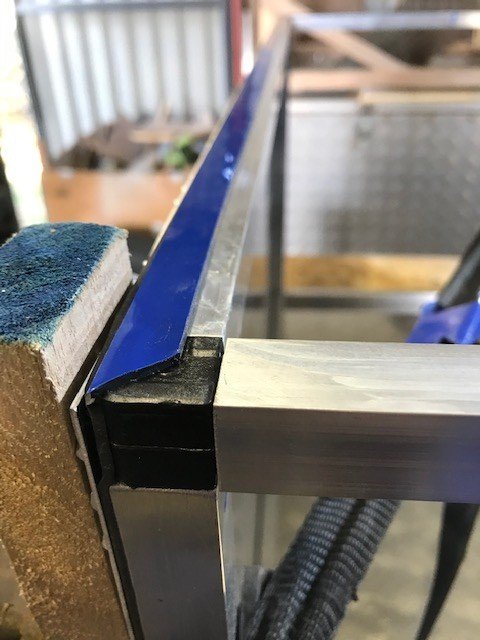
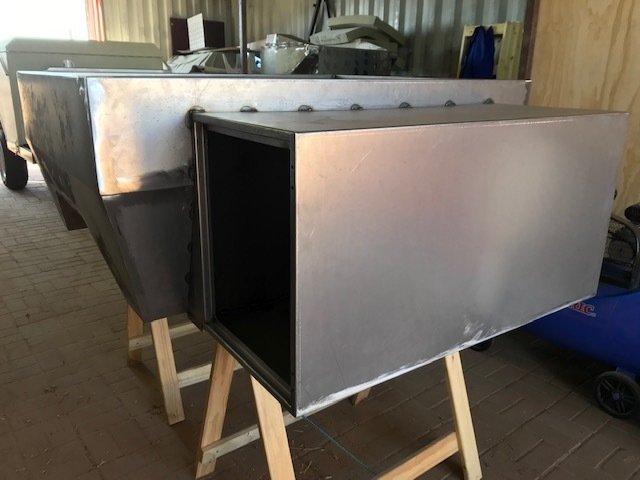
The next task is to build the nosecone. The frame of the nosecone is constructed from aluminium tubing, using strong, durable corner fasteners. Then aluminium tread-plate is cut to size and attached to the frame with industrial strength tape that eliminates the need to use rivets. This tape is so strong that it is used to bind aluminium facades to skyscrapers and warehouses, but offers some degree of flexibility.
 |  |  |
(Update: 2020/05/23)
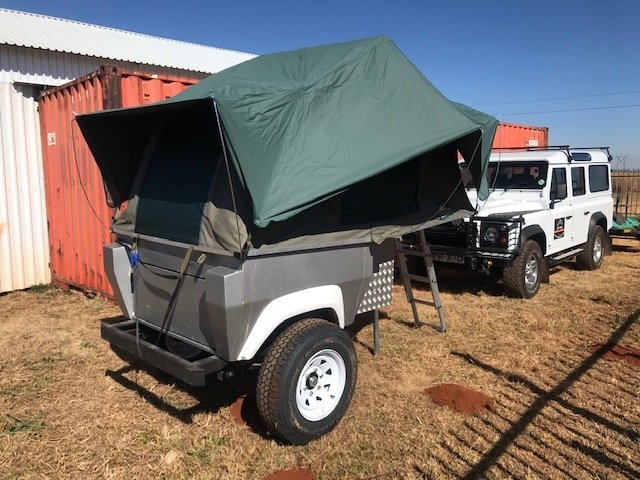
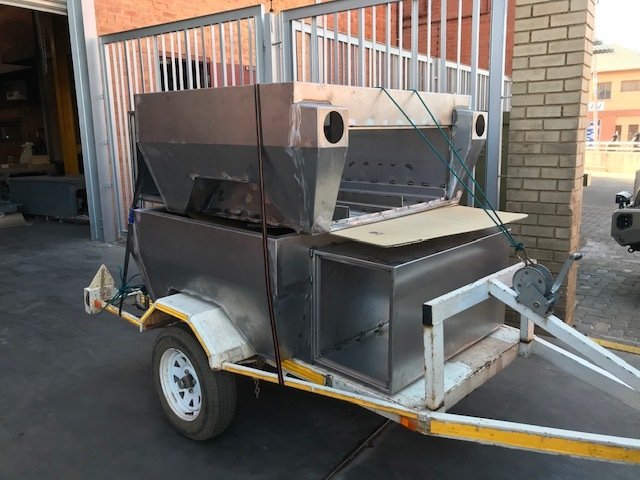
Now that at.EZee is really taking shape, we put all the major components together for a test fit. I am over the moon to say that everything fits as planned. Here are the first sneak pics of at.EZee.
 |  |
 |  |
What is missing from the photos above, is the roof top tent. This is a standard 2.4 x 1.4M RTT. The tent opens forward over the nosecone and draw-bar. Access to the tent is quick and easy, via a very short ladder from the front , or from the rear, by stepping on the integrated bumper.
I would like to highlight a few features that may not be immediately apparent.
- The body is constructed of fibreglass, the nosecone of aluminium. Both components are rustproof, rugged and lightweight.
- The body includes a wide door at the rear, that provides access to the main storage area. It caters for 4 x high top ammo cases which can be slid out for access.
- The nosecone provides a lot of additional storage and opens to the side. It allows for a small fridge, should that be a requirement.
- Above the main storage area there is ample room for at least two fold-up chairs and a camping table. Some smaller areas ahead and behind the wheel arches provide further packing space.
- The chassis is constructed of sturdy 2.5mm mild steel, lip-channel or C-channel, and sports a strong integrated full length rear bumper. The bumper features a swing away spare wheel holder (for campers fitted with large wheels) and can also accept a bicycle rack. The spare wheel will be stored ahead of the nosecone on Campers fitted with smaller wheels.
- The 900 kg rated axle features leaf springs, and caters for 13", 14" and 15" wheels, depending on the owner's requirements.
- The Camper is rated for smaller tow vehicles and has a maximum all up mass of 750 Kg. The mass of the Camper is under 350 Kg, so it will be light and easy to tow.
- When fitted with the 15" wheels, the entry angle is excellent due to the short wheelbase and high clearance, and the departure angle is in excess of 60 degrees.
- Rear lights are round LED units that incorporate tail, stop and indicator lights in a single unit. They are to be fitted into the panels on either side of the rear access door. Here they are safe from damage and clearly visible to other road users.
| Update 2020/06/02. Aidan and I have been joined by Francois in the workshop for a few days. He is a guru with fibreglass moulding, so we are flying along swiftly, very pleased with the progress. The moulds should be completed this week, then we can pop the first real at.EZee trailer out next week.... Just can't wait anymore.... | 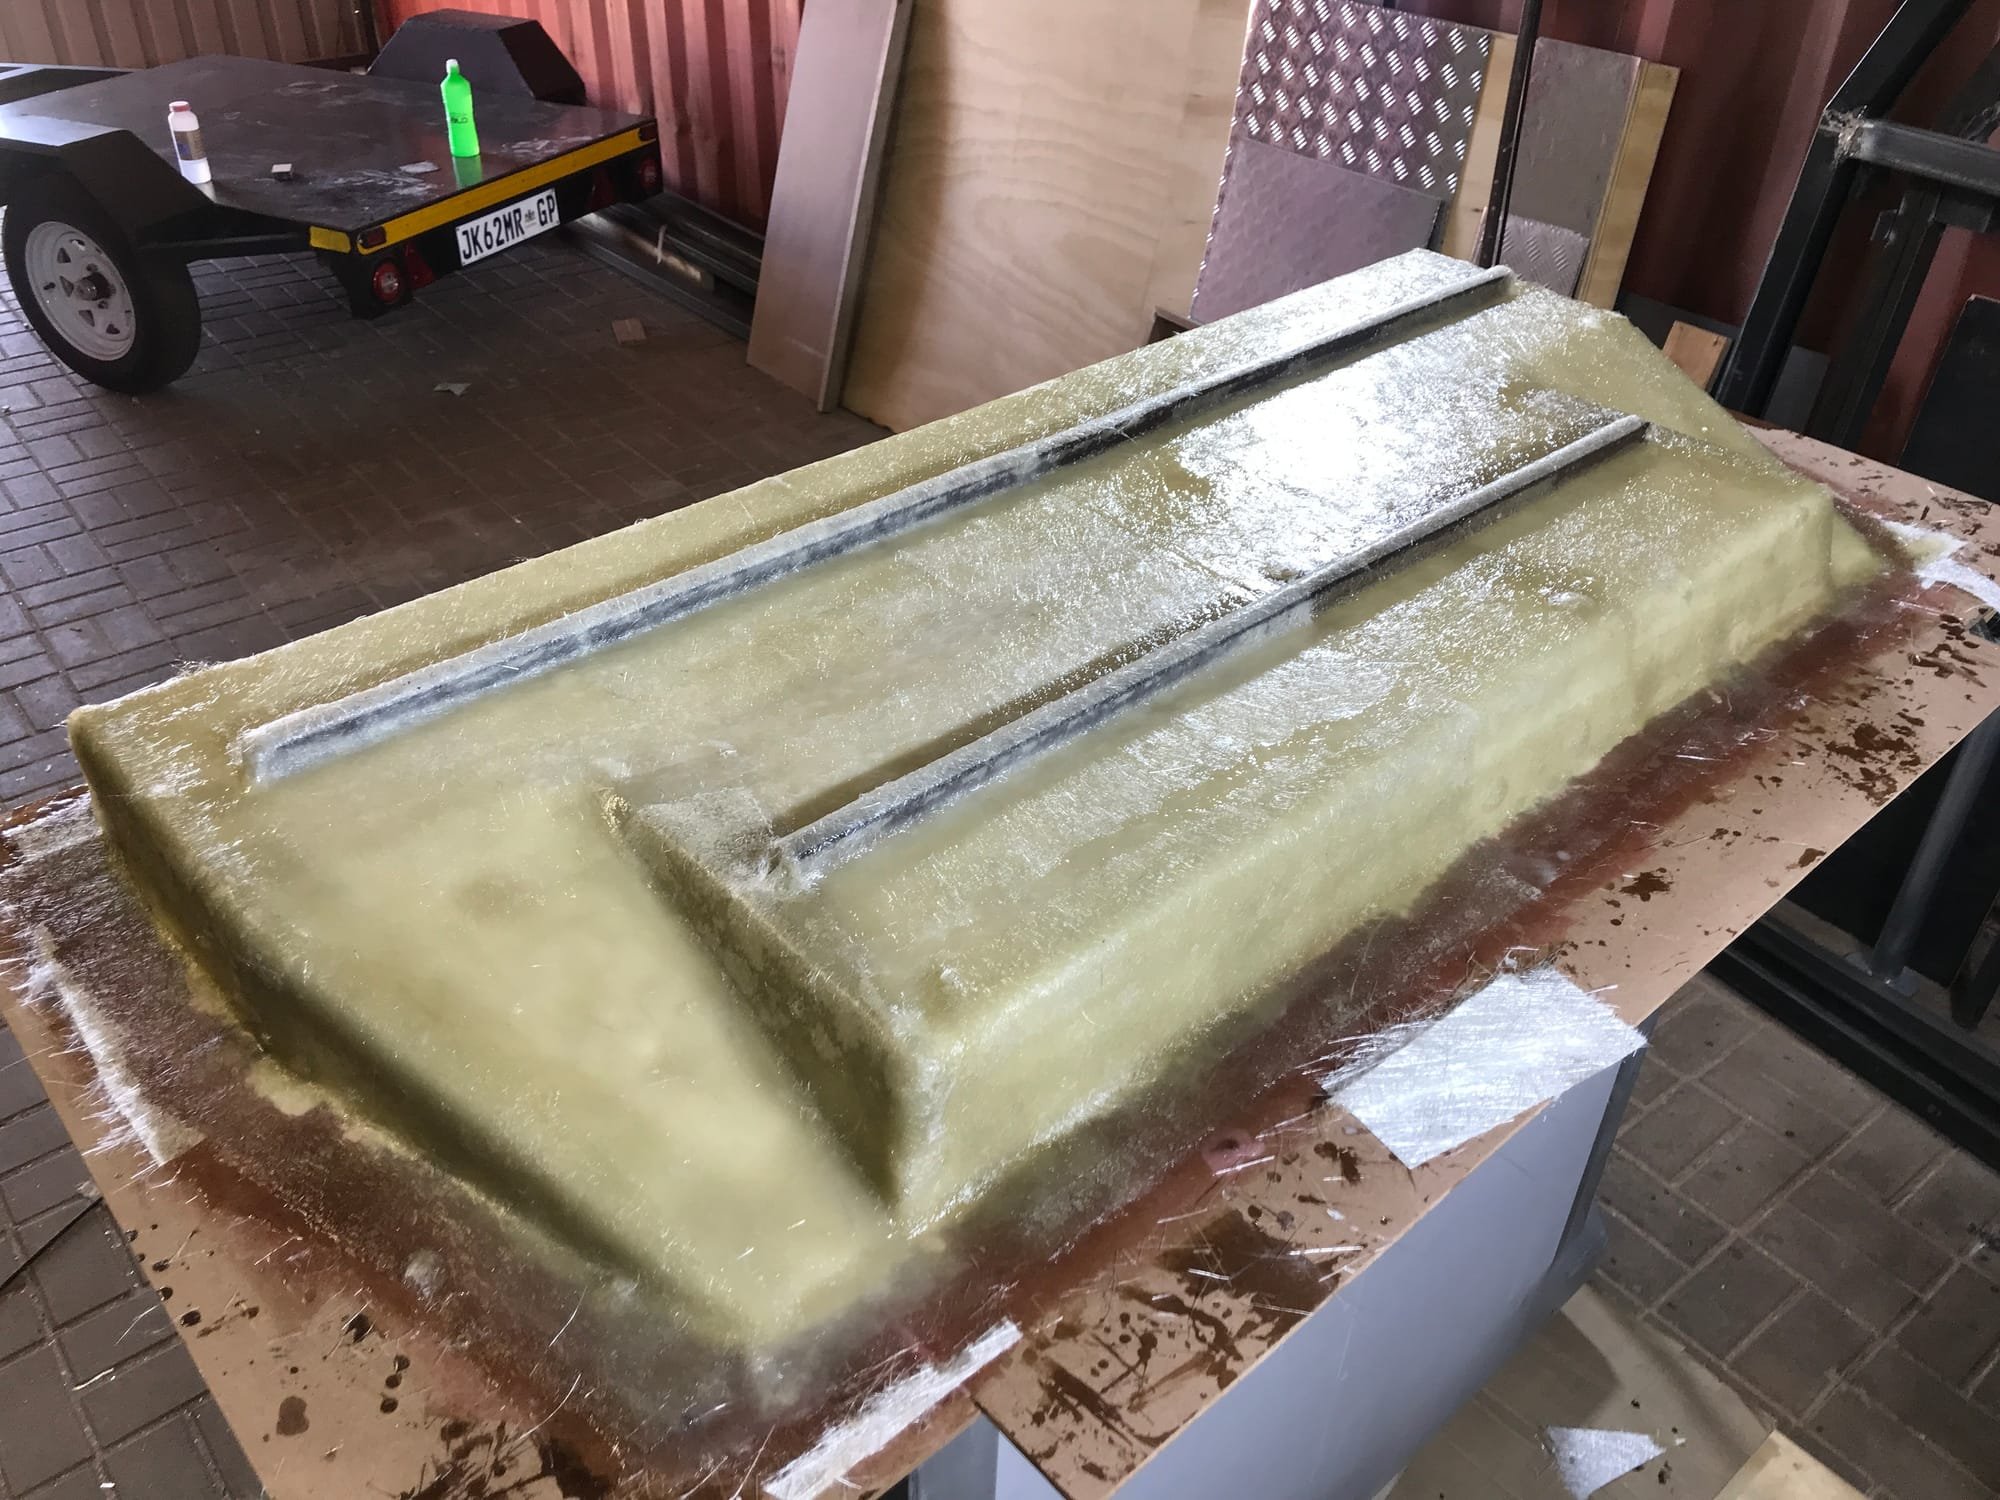 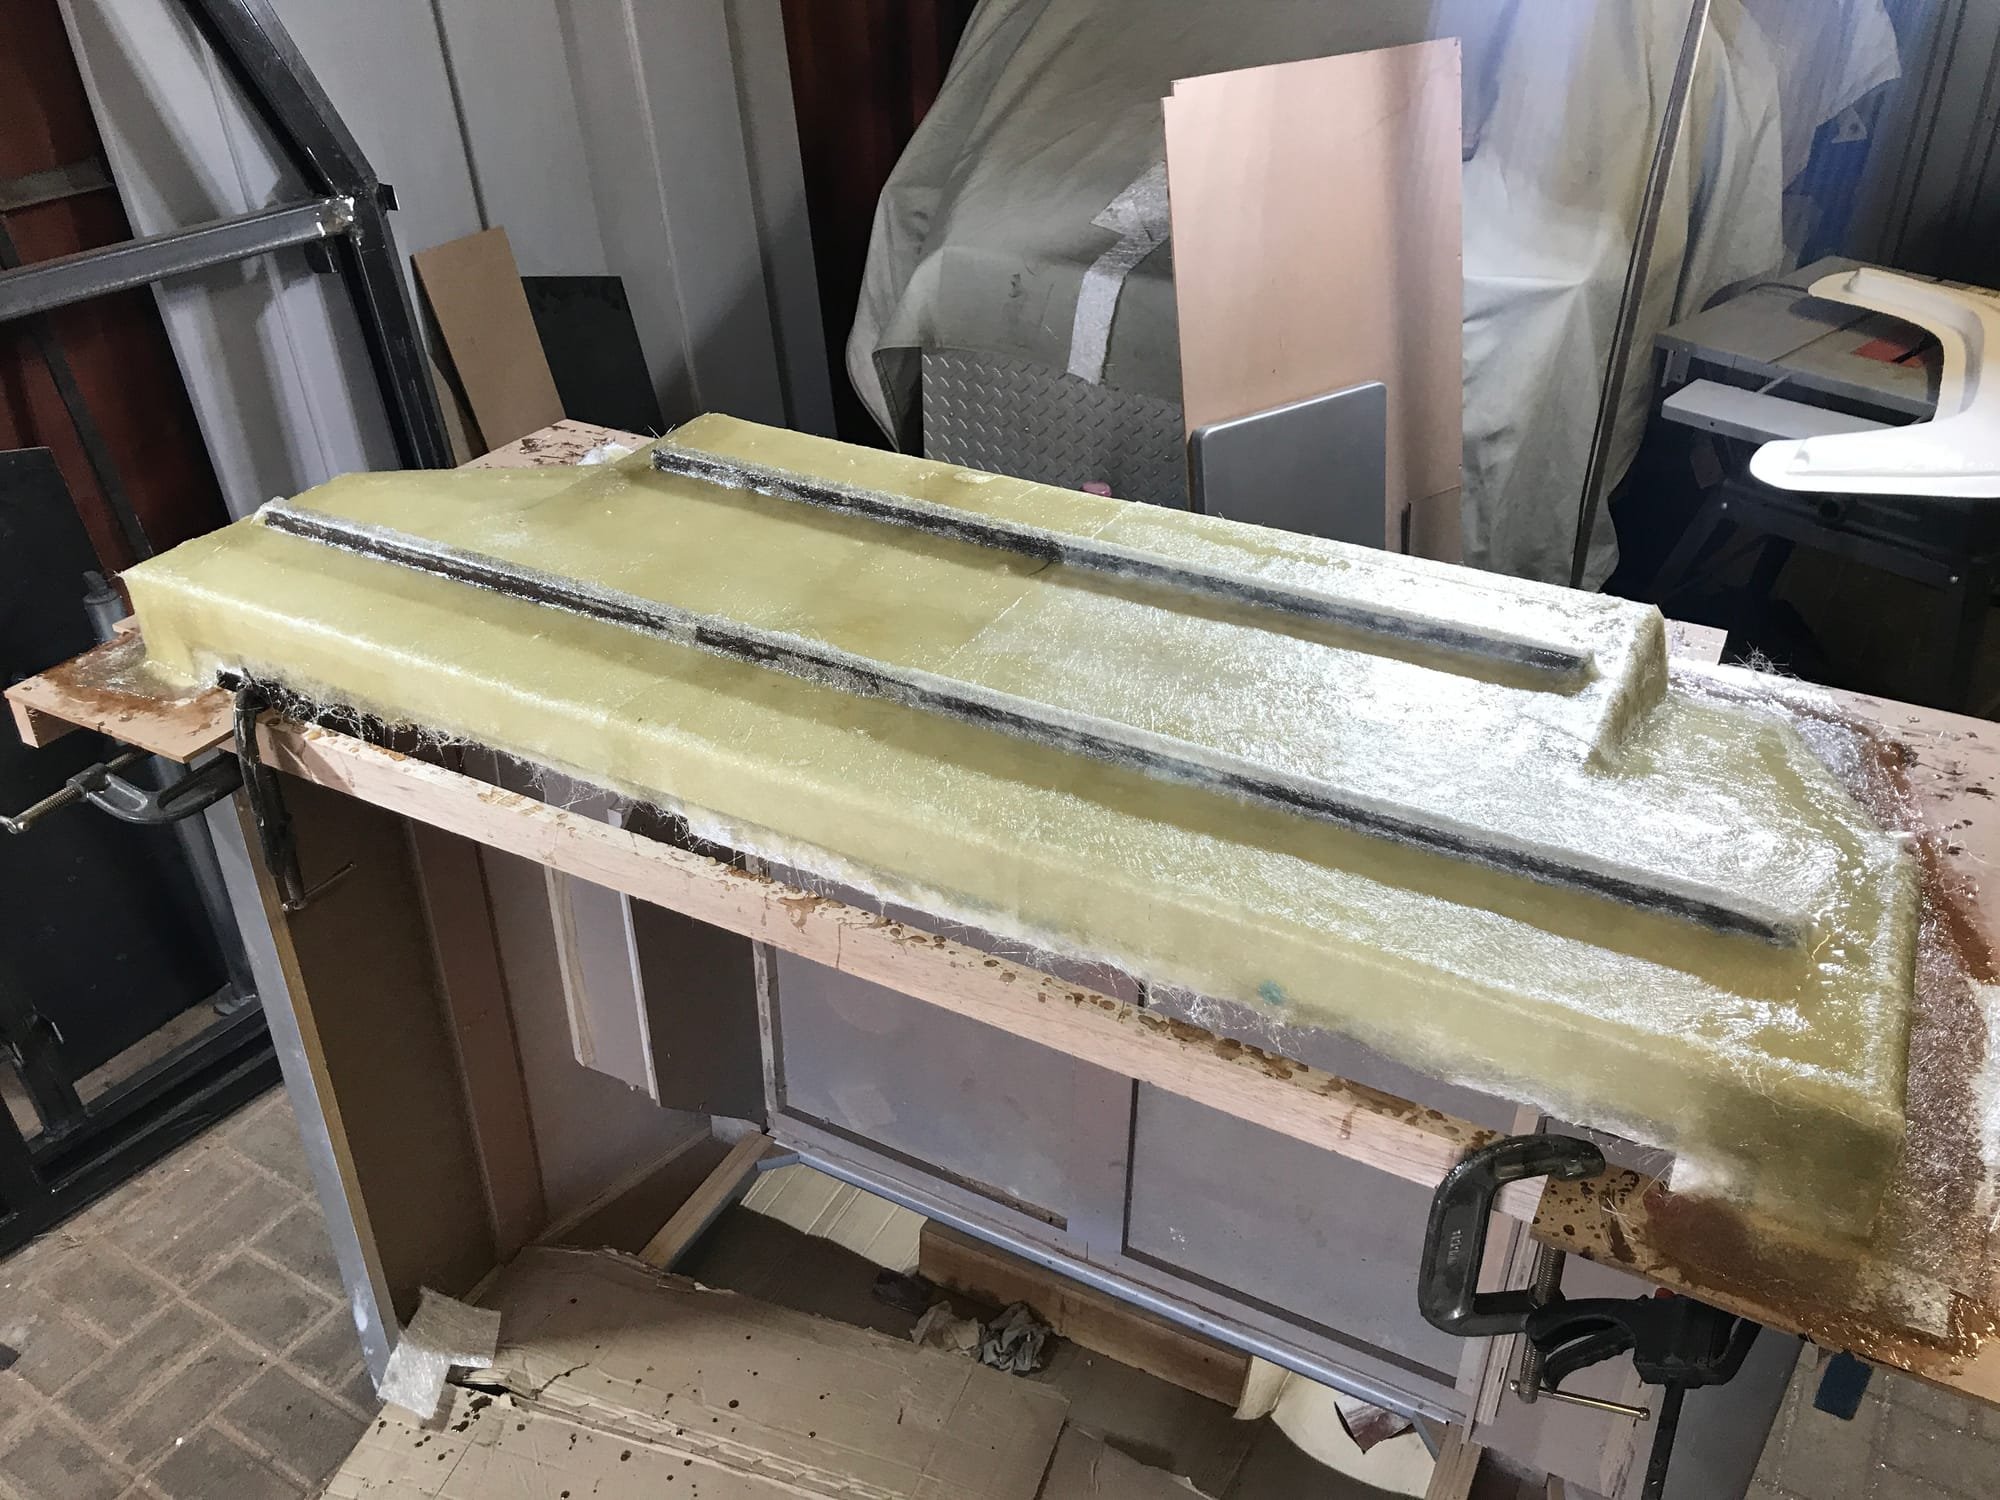 |
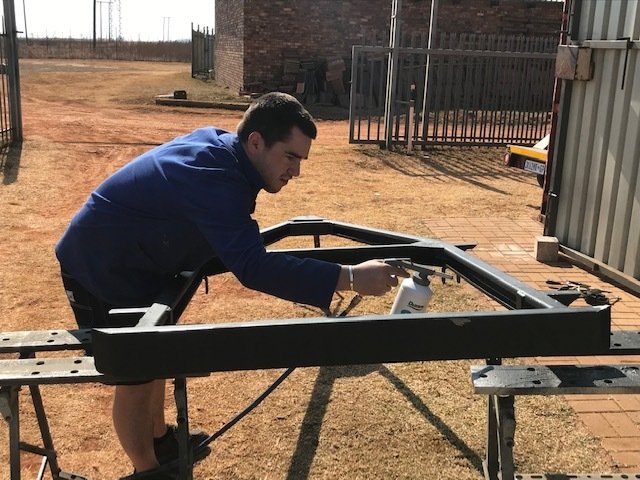
Update 2020/06/10. After finally receiving the specially manufactured axle from the suppliers, (they are also at 50% workforce levels) we started final assembly of at.EZee's chassis #1 today. This is the X-Version, "X" stands for "Expedition" option. It is equipped with the larger 15" six stud wheels and sports higher ground clearance. It is meant for the more serious off roader that does not want to drag a heavy trailer along...
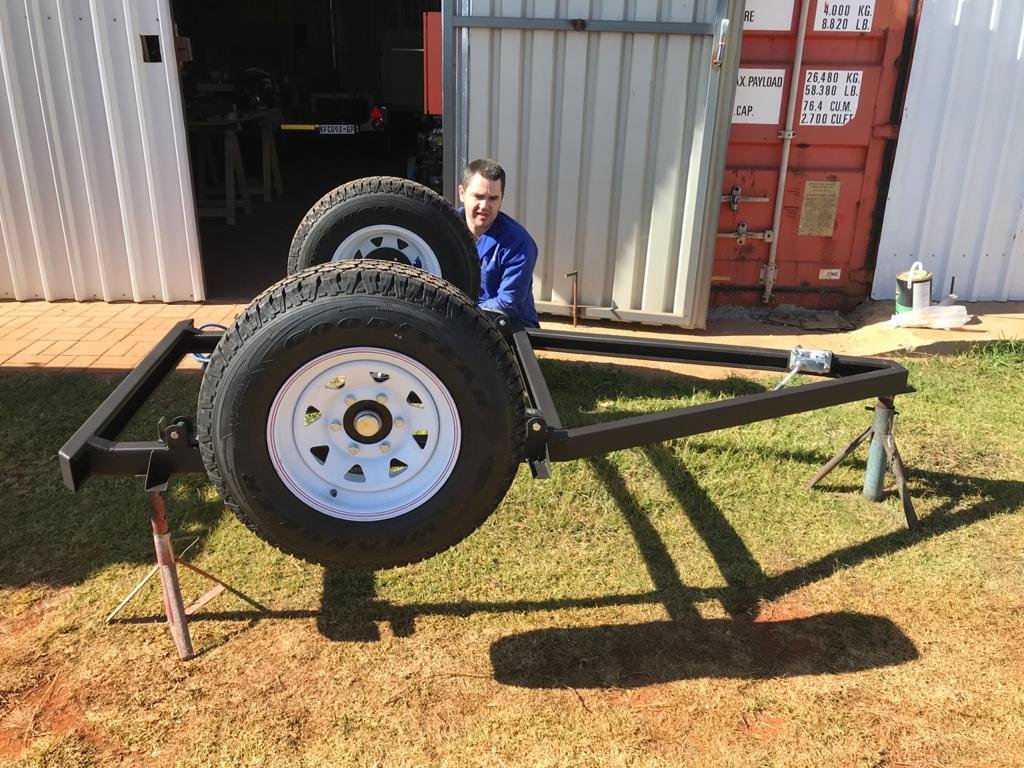 | 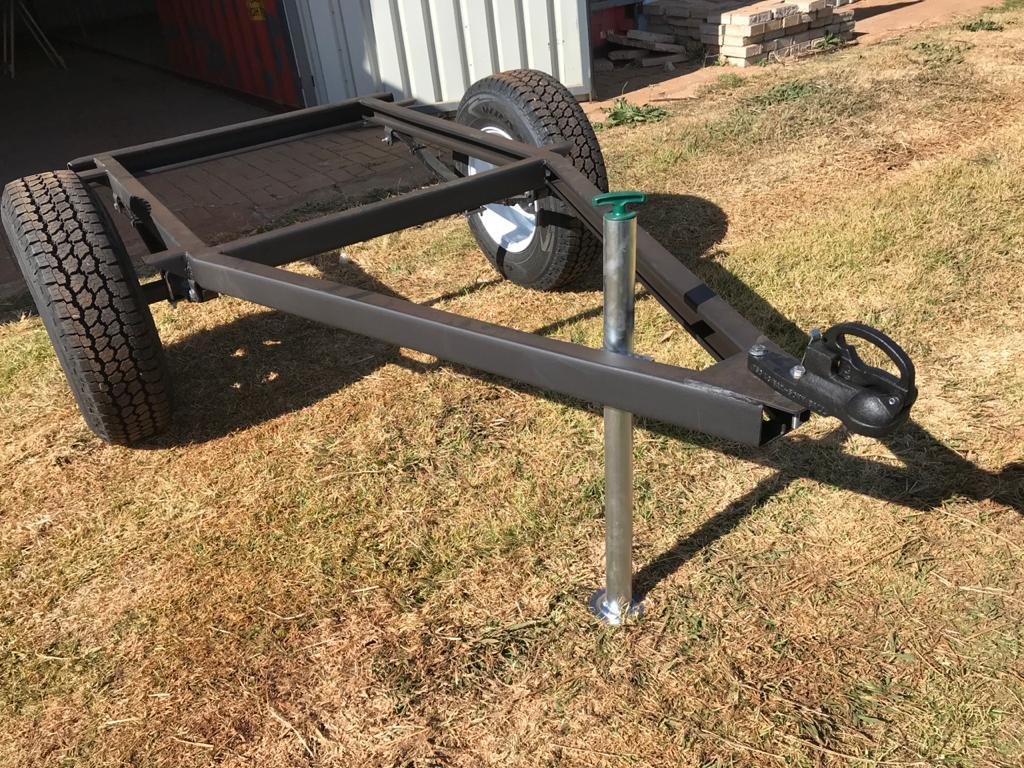 | 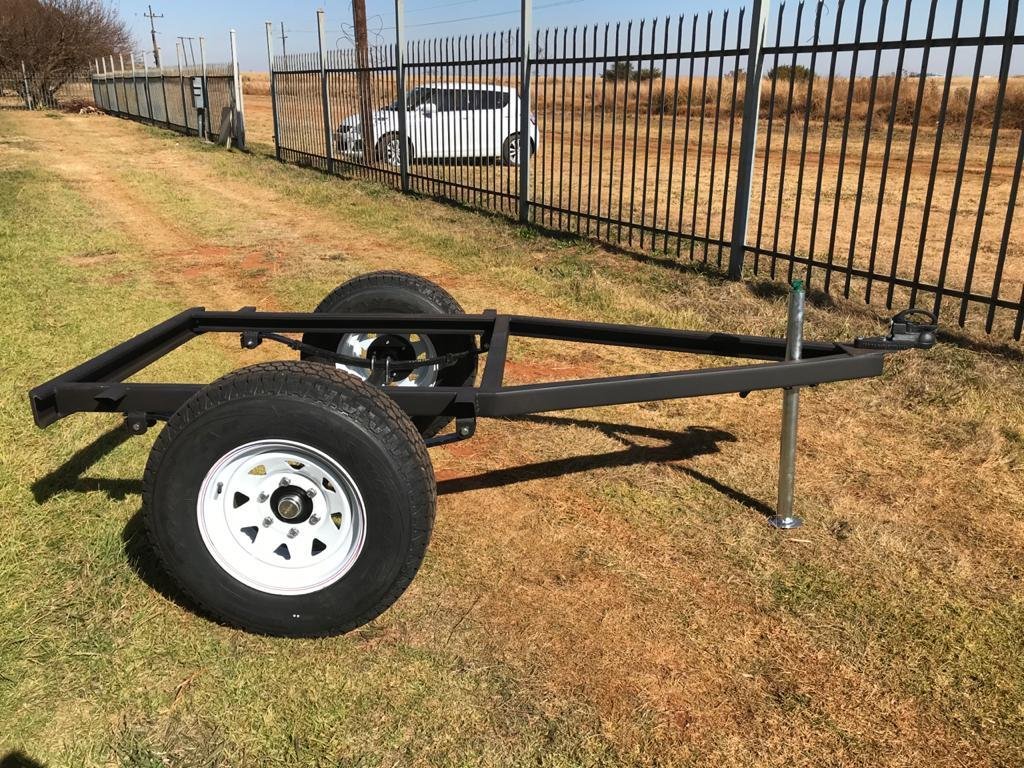 |
Aidan is fitting the axle and wheels. The next photos show the chassis from various angles, so one can get an idea of it's compact size. The last two photos are of the now fully completed mould, waiting for the fiberglass to cure fully before we take the pattern out and can start laying up the first actual body of the camper.
We have been held up a little waiting for suppliers to get up to speed and also because we have moved to a larger workshop, as the smaller workshop was just to small for our operation.
Update 2020/08/04. We have been working our behinds off, and have not had a chance to update the website, so my apologies to our visitors, but I will explain why.
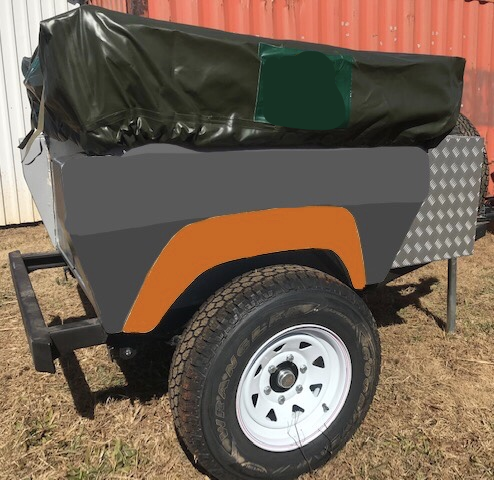
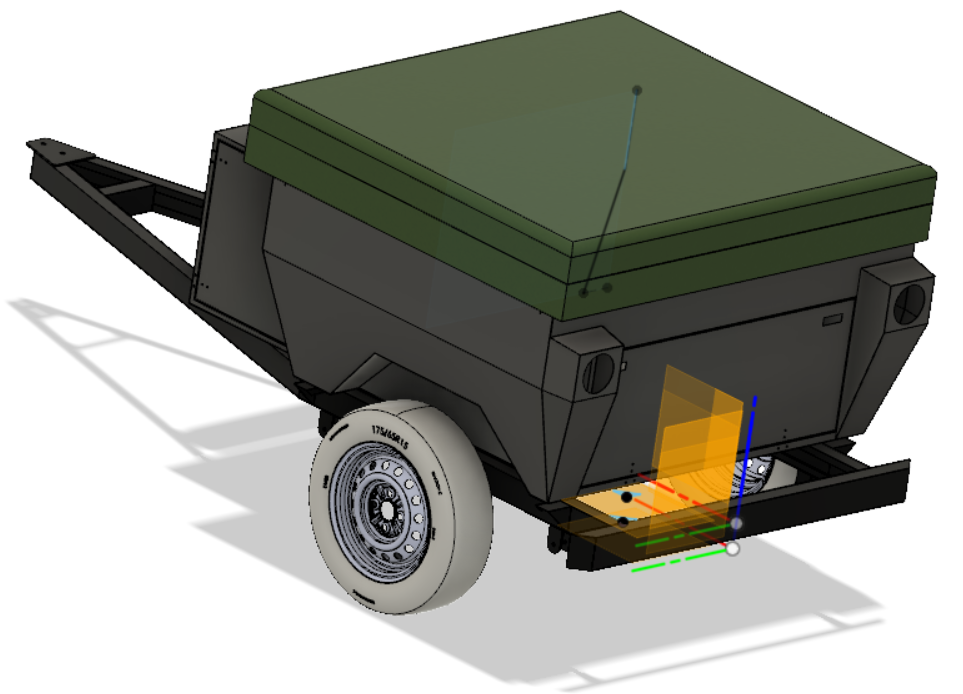
Firstly here is a mock up of what our micro camper at.EZee will look like.
 |  |  |
When we removed the fibreglass mould from the form, it was a total disaster. The cold weather had impacted the curing process and left horrible marks in the mould. We were dismayed by the unreliability of the fibreglass manufacturing process. We decided to change direction and have the trailer bodies made from steel, which is a much more predictable process.
Aidan and I jumped onto the CAD system and translated the existing wooden form into CAD designs, using the dimensions and profiles that we had designed when building the original wooden form. The result was the body, chassis and assembly as below.
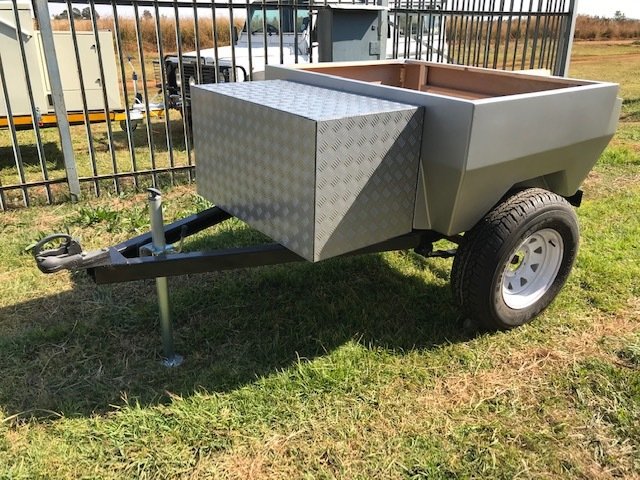
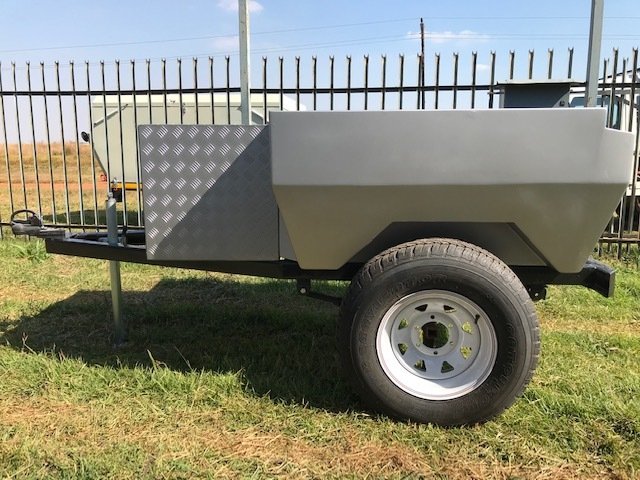
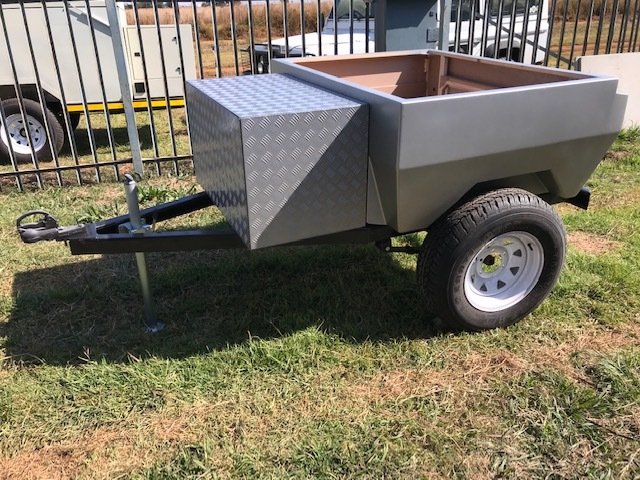
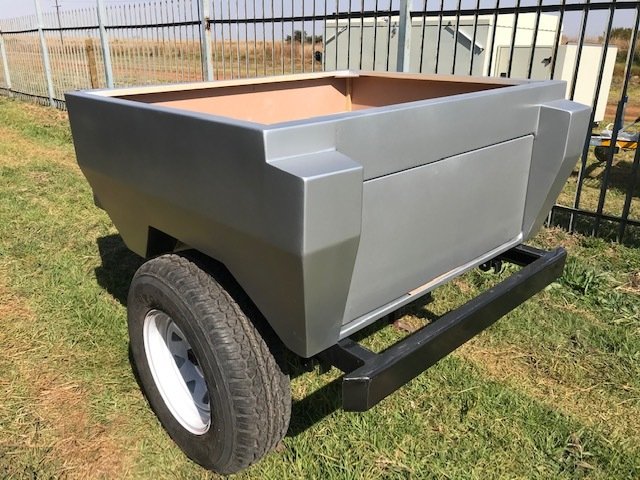
Here comes Version 3!!!
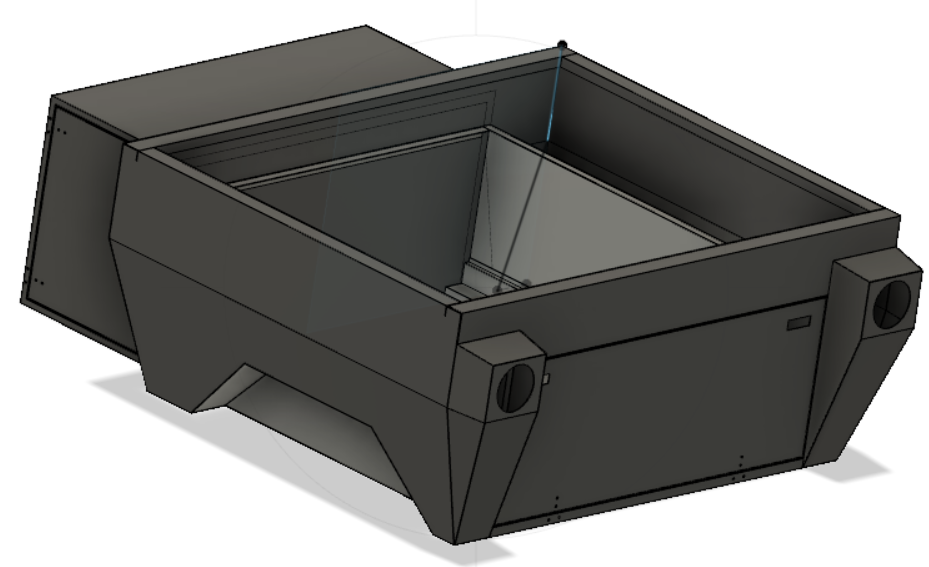 | 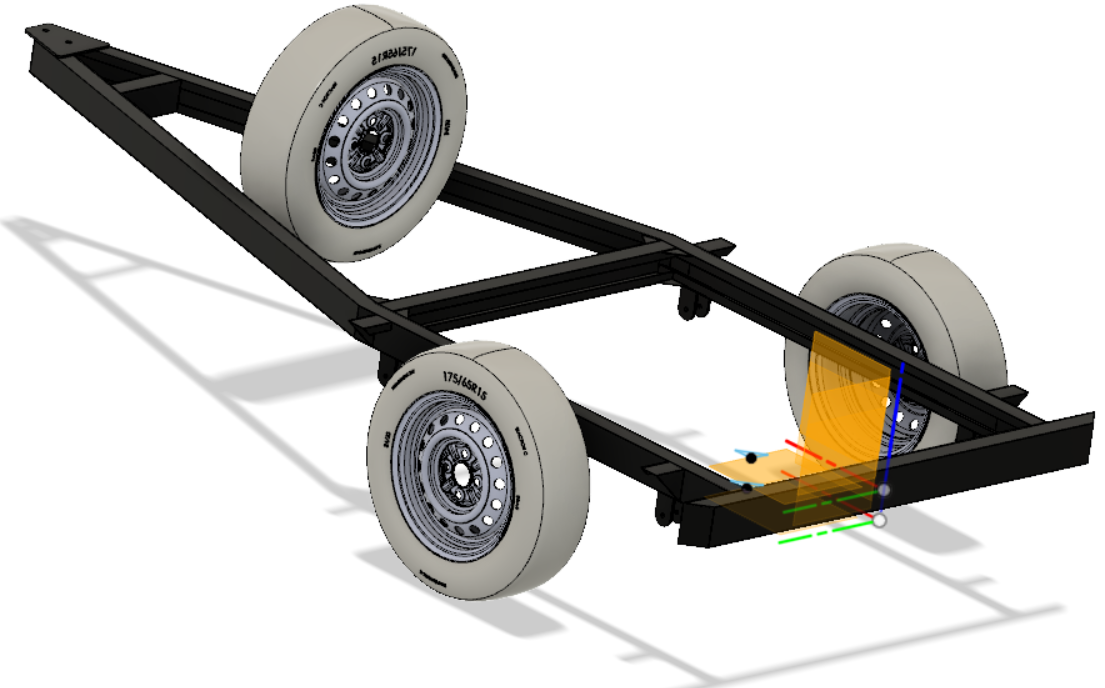 |  |
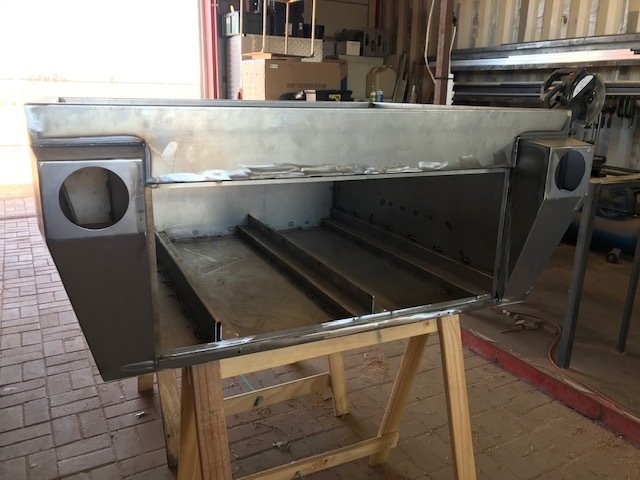
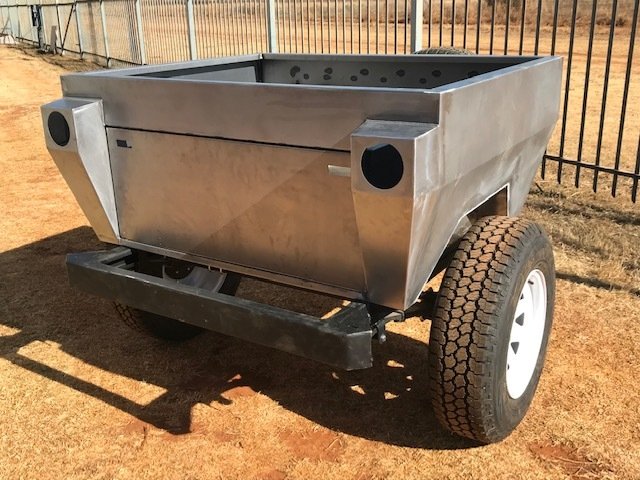
Once the CAD drawings had been completed we contracted a well known manufacturer of steel products to construct 2 bodies for us. We simply sent them the CAD files and they started building. They have the machinery to laser cut the steel panels from sheet metal, bend them with CNC machines and weld the seams together, to form a complete trailer body. We also decided to incorporate the nose cone into the design so it will also be made of mild steel. For customers who prefer stainless steel, this option, as well as an aluminium option, will also be available in future. On 16 July 2020, we collected the first 2 bodies.
 |  |
While we were waiting for the bodies to be completed, we contracted a trailer manufacturer to build the first two chassis's for us. We used the chassis that we had built previously as the basis for our CAD design, and also provided it to them as a sample. Once the orders had been placed, the two chassis's were delivered less than two weeks later, just in time for the arrival of the bodies.
And then the work really began.
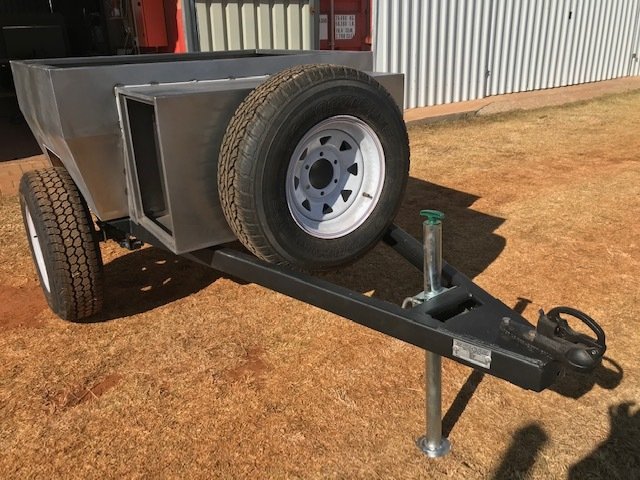
The first trailer chassis was kitted out with suspension, tow hitch, and all the other pieces.
 |  |
Then the body was fitted to the chassis and assembled fully. The doors and tailgate were installed, all the hinges and latches were pre-fitted to make sure everything would work on the final product. Even the lights were pre-fitted. Only once the tent had also been fitted, could we be sure that the camper's dimensions were all correct. It must be said that there were one or two small miscalculations, which we had to resolve, but overall the camper looked great and worked as designed. Along the way we took careful notes of what needs to be changed for body and chassis number 3.
 |  | 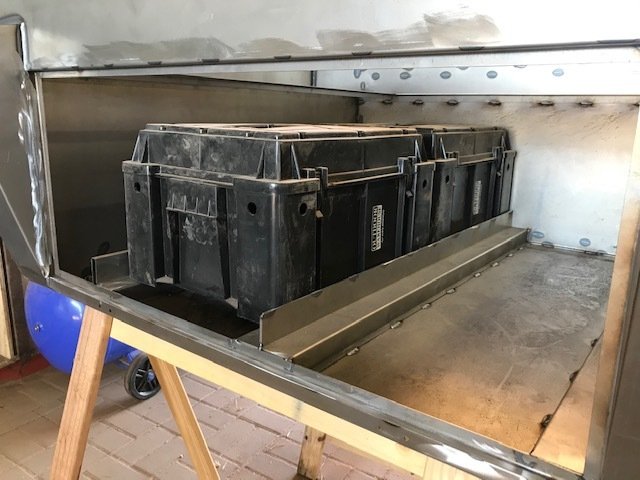 |
 |  |
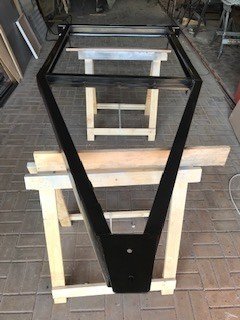
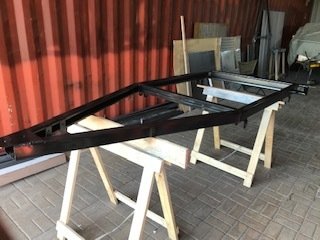
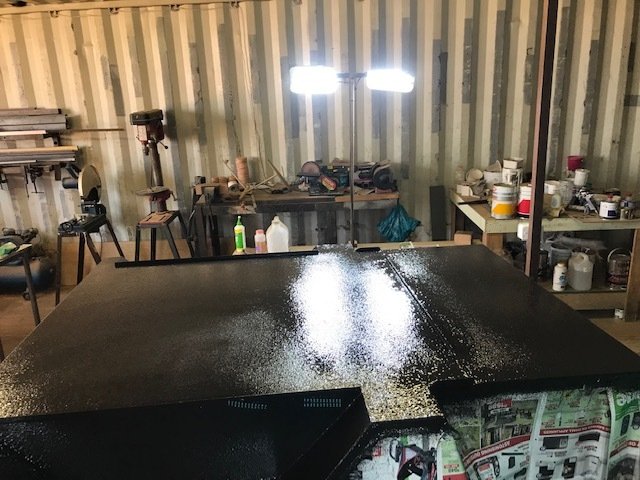
At this point, we dissembled the entire camper, and began the process of painting all the components. The chassis was cleaned, prepared and spray coated with stone chip paint, which is a long lasting coat, that is hard wearing and rust resistant.
 |  |  |
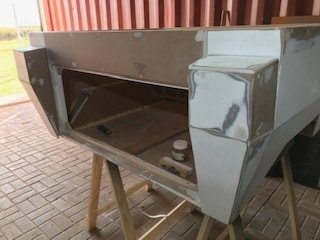
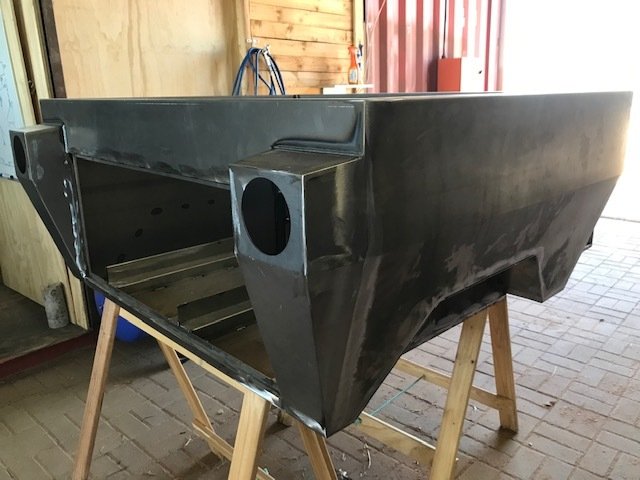
Then the work started on the trailer body, the steel was cleaned, de-greased, wet sanded to a smooth finish and then undercoated with several coats of durable 2K etch primer. The entire underside, inside of the body and nose cone were then coated with stone chip to match the chassis.
 |  |
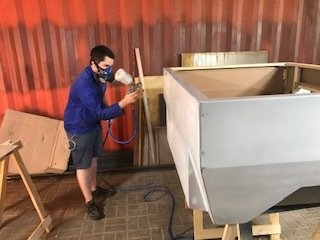
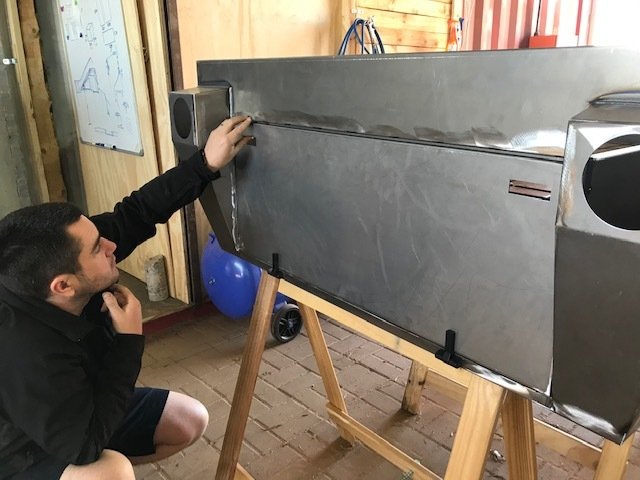
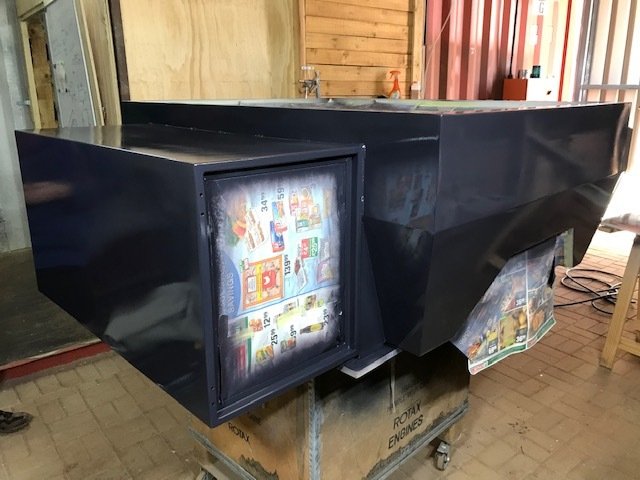
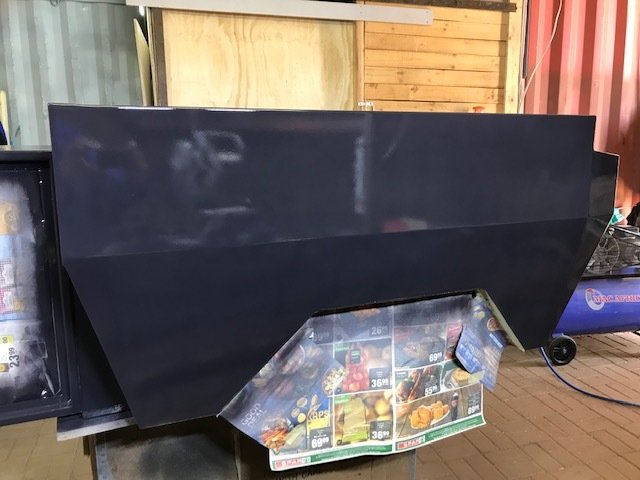
Then work started on the outer panels. The insides were masked off to prevent the outside paint from contaminating the areas that had already been sprayed. We then sprayed several layers of 2K colour coat, wet sanding in-between coats of paint and finished off with a final layer of clear coat, that will help to preserve the colour when the camper is used in the bush.
 |  |  |
This whole process took us almost up to the end of July to complete.
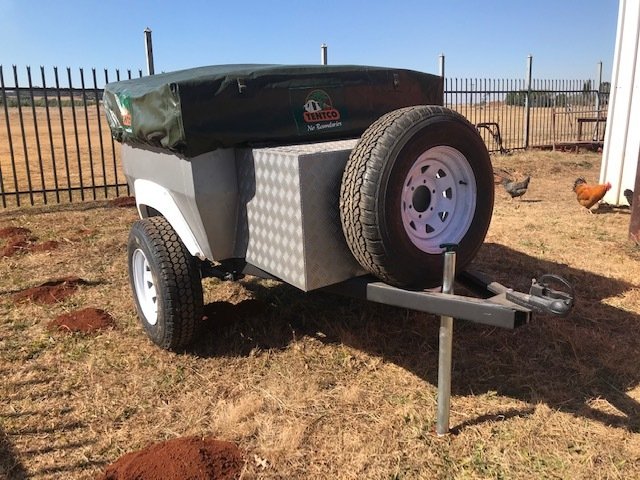
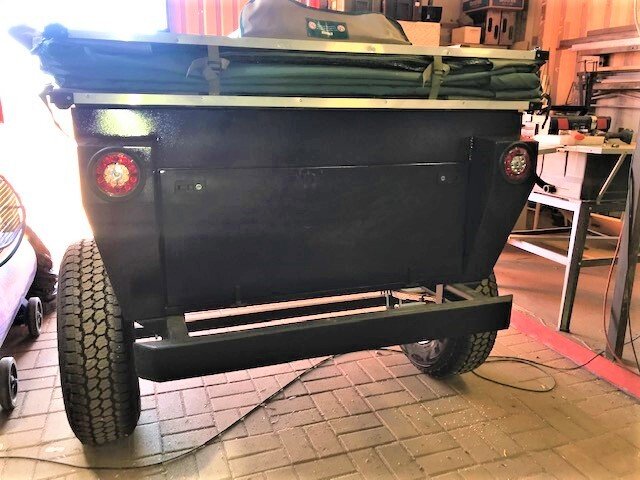
Once the paint had dried over the weekend, on 3 August we began the re-assembly process. The shiny new trailer body was reunited with the chassis (which now had it's suspension and all the other parts fitted) and bolted on. Nosecone doors and the tailgate were attached, the hinges fitted and adjusted so that the gaps all around the closures were perfect. Locking door latches were fitted and adjusted. The rear lights were fitted and the wiring completed. The tent was then fitted and attached to the trailer body. Gas struts were attached and locking latches attached.
As we stand now, the camper now looks like a camper. The next steps entail polishing the paintwork, fitting accessories and a that all important road test.
 |
We will then take the camper on a road trip to iron out any kinks and at the same time, begin the production process on body #2.
For some sneak pics of at.EZee (pre-launch) please click on the at.EZee link